Zeiss Multisensor Measuring Machines

More than any other company, Zeiss uses its expertise in the fields of optics and industrial metrology to create new, pioneering products. The result is a range of optical and multi-sensor systems which will impress you from day one. These include the Zeiss O-SELECT digital measuring projector, the Comet fringe projection system and the O-INSPECT multi-sensor measuring machines.


O-SELECT

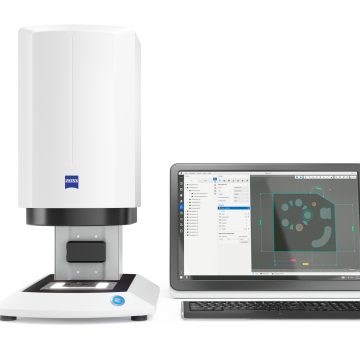
Carl Zeiss O-Select Digital Measuring Projector


  • Reliably measure at the push of a button
  • Machine size 402 mm x 510 mm x 727 mm (W x D x H)
  • Size of measuring field:
    • 114 mm x 91.5 mm (without shifting table)
    • 214 mm x 91.5 mm (with shifting table)
  • Automatic setting of both illumination and focus, measuring errors due to operator influence are eliminated
  • Offers a high level of automation and ease of use
  • Complex measurements can be completed quickly, traceably and reproducibly
  • Suitable for checking the dimensional accuracy of distances, radii or angles
  • Automatically identifies the characteristics to be tested and sets the focal plane accordingly
  • Illumination is set automatically to each characteristic
  • Using an automatically high-contrast and focused image, ZEISS NEO select software identifies possible features like circles and straight lines
  • Can measure multiple parts simultaneously
  • Shifting table can be moved automatically and allows larger components to be measured quickly.
  • Illumination coaxial to the optics is also available

Downloads Downloads:
O-INSPECT_322_2_sw

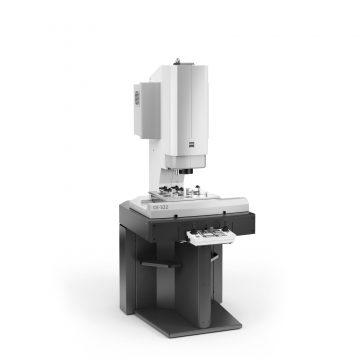
Carl Zeiss O-Inspect Multisensor Measuring Machine


  • Optical and measuring technology in a single system
  • Integrates functions of profile projector, CMM, contour measuring instrument and microscope
  • Delivers reliable 3D accuracy compliant with ISO standards at a temperature range of 18-30°C
  • Available in three measuring ranges
  • Equipped with VAST XXT scanning sensor
  • Discovery telecentric zoom lens optically measures test objects with extreme precision even if different material thickness
  • Adaptive illumination system enables better optical measuring results
  • Probing rack
  • Calibration sphere
  • Optional: white light distance sensor
    • rotary table
    • loading system with glass pallet and hole grid pallet
    • calibration pallet

Downloads Downloads:
Carl Zeiss comet 6 image

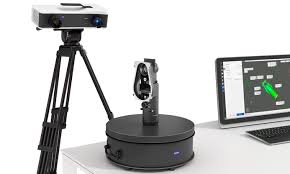
Carl Zeiss Comet 6 Optical Measuring


This 3D scanner is equipped with a compact high-performance 3D sensor which uses innovative structured blue LED lighting 3D scanning technology. The ZEISS COMET 6 uses adaptive projection technology (3D ILC – Intelligent Light Control) to locally adapt the light quantity projected onto the object surface. This minimises undesired effects such as glare.

This 3D scanner is recommended for quality control/inspection, mould and tool making, rapid manufacturing and 3D printing, reverse engineering and aerospace.

  • 16 megapixel camera resolution for the highest level of detail
  • Adaptive projection for optimum lighting
  • Excellent data quality
  • High measurement speed
  • Ergonomic sensor handling
  • Easy-to-change measurement field
  • Outstanding accuracy
  • Selectable measuring mode
  • Maximum resolution
  • Maximum image capture speed
  • https://youtu.be/c4M1NC0jCl0


    Downloads Downloads:
    Carl Zeiss t-scan image
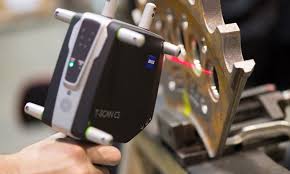
    Carl Zeiss T-Scan Optical Measuring

    Zeiss T-SCAN hand-held scanner has been ergonomically tailored to the operator’s needs, enabling effortless and intuitive scanning. With its light-weight and compact sensor housing, the device is ideally suited for capturing data in even the most difficult-to-reach areas.

    This 3D scanner is recommended for quality control/inspection, mould and tool making, rapid manufacturing and 3D printing, reverse engineering and aerospace.

    The T-Scan range offers:

  • Portable systems
  • Touch probe for single point measuring
  • High measurement speed
  • Adjustable laser intensity providing the ability to scan dark and shiny surfaces
  • Measurement of moving objects using dynamic referencing
  • Multi- camera operation allowing for large components to be measured from all sides
  • https://youtu.be/iautm8gwbAU


    Downloads Downloads: