Zeiss Bridge-Type measuring machines

For faster, more precise measurements, take a look at the range of bridge-type CMMs. These offer surface roughness sensor technology, for a more efficient throughput of parts that require both geometry and surface roughness measurements.




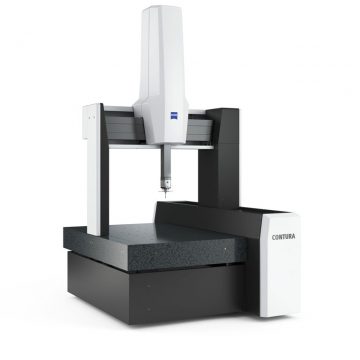
CONTURA

Carl Zeiss Contura Bridge-Type CMM


  • Active scanning measuring technology
  • Length measurement error E0 from 1.5 + L/350 μm
  • Available with four sensor configurations and in eight measuring ranges
  • Comes with a fixed passive sensor, the flexible RDS articulating probe holder or with an active scanning probe. All sensor variations enable scanning
  • ZEISS navigator technology comes standard with the active version
  • Ceramic or CARAT guideways for high rigidity, low thermal expansion and minimal moving weights
  • Air bearings in all three axes ensure consistent stability even at high travel speeds and acceleration
  • Floating glass ceramic scales are practically expansion free and therefore do not require any additional temperature sensors or mathematical compensation.
  • Suitable for the shop floor and are protected against contamination and other influences.
  • Sensor variations

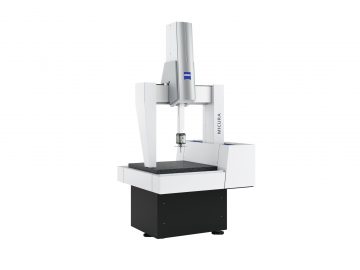
Zeiss Micura

Carl Zeiss Micura Bridge-Type CMM


  • Maximum precision for measuring small, complex parts featuring narrow tolerances such as those used in optics and electronics
  • Length measurement error E0 from 0.7 + L/400 μm Measuring range 500 x 500 x 500
    Offers active scanning with measuring accuracy of less than one micrometer
  • Equipped as standard with VAST XXT scanning sensor from ZEISS
  • VAST XT gold sensor (optional) enables high-speed scanning featuring up to 200 measuring points per second
  • The smallest stylus has a diameter of just 0.3 millimeters
  • Ceramic guideways and a large bearing base minimize susceptibility to external influences
  • ZEISS air bearings on four sides guarantee stability and precision
  • ZEISS MICURA also comes with a temperature sensor for the workpiece
  • The probing force of the sensor is actively regulated and is very low – ideal for sensitive materials
  • Controller technology, software, sensors and additional components are made by ZEISS and are finely tuned to each other

Downloads Downloads:
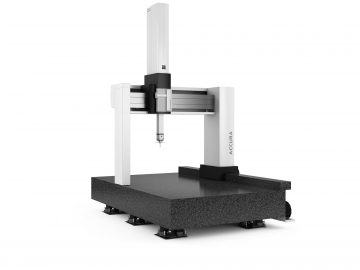
ACCURA

Carl Zeiss Accura Bridge-Type CMM


  • Modular design can be modified to meet changing requirements on the configuration, sensors and software
  • Length measurement error E0 from 1.2 + L/350
  • Temperature range of 20ºC to 26ºC
  • Pre-wired for contact and optical sensors, as well as scanning, makes it immediately multisensor capable
  • Comes standard with VAST navigator technology to enable even faster calibration, approach and scanning, as well as improved precision
  • High-performance isolation on the bridge for maximum effect
  • CARAT guiding technology for high dynamics and performance
  • High degree of flexibility when choosing the sensor
  • Glass ceramic scales for high accuracy and temperature stability
  • Air bearings for high accelerations and performance
  • Touchscreen operation
  • Stylus changer rack
  • Wireless control pane

Downloads Downloads:
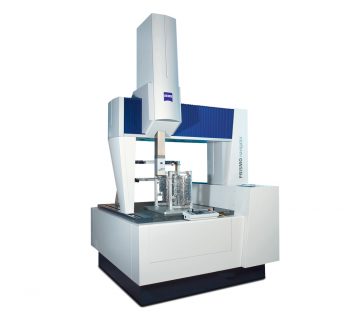
PRISMO Navigator
Carl Zeiss Prismo Bridge-Type CMM

  • High-speed scanning and maximum accuracy near production
  • Length measurement error E0 from 0.5 + L/500 μm
  • Available in eight measuring ranges
  • Automatically configures the maximum measuring speed during scanning
  • Saves time through tangential approach and scanning, helix scanning and fast dynamic stylus calibration
  • Computer guided corrections of all dynamic influences on the machine
  • Bridge made of carbon-fiber compounds and ceramic for minimal weight and high flexural strength
  • Temperature-neutral, glass ceramic scales
  • All axes with air bearings from ZEISS on four sides. X axis: 8 air bearings; Y axis: 8 air bearings; Z axis: 5 air bearings
  • Elastomer vibration damping, as well as covered guideways and scales for use near production
  • Workpiece weights up to 5,000 kg

Downloads Downloads: